


Storm season can be a nightmare for coastal homeowners. The severe conditions of tropical storms and hurricanes usher in the threat of damage to houses and danger to civilians. If you live in a storm-prone area, you must take action to safeguard your home against treacherous weather conditions.
A critical step in protecting your home and family is to ensure window openings are shielded from high winds, rain, and flying debris. If your home isn’t equipped with traditional hurricane shutters, you can install your own makeshift shutters with a few common tools and materials.
Tools and Materials Needed for DIY Storm Shutters
Check out the lists below for the tools and materials you’ll need. You might have a few of these items already on hand. If not, you’ll easily find them for rental or purchase at a local home improvement store.
Tools:
- Tape measure
- Circular saw
- Power drill
- Drill bits
Materials:
- Exterior-grade ⅝-inch plywood boards
- Lag screws
- Washers
- Wood sealer
- Paint roller
5 Steps To Boarding Windows With Plywood
Now that you know the tools and materials you’ll need to protect your home, we’ll dive into step-by-step instructions for installing DIY plywood storm shutters. We’ll provide tips and tricks to give you peace of mind when the next disaster strikes.
Step 1: Measure the Window Frames
The first step is counting and measuring your home’s exterior windows. Measure the windows from top to bottom and side to side, noting each measurement as you go. You’ll want your panels to overlap the windows by a few inches, so add 10 inches to the height and width measurements to account for 5 inches of extra coverage on each side. If your window has a protruding bottom sill, add only 5 inches to the height measurement.
Buy enough pieces of plywood to cover your exterior windows and measurement needs. If you need bigger panels to cover large windows or exterior doors, you can connect two boards for complete coverage. Connect the plywood panels by drilling them to a two-by-four at the joints. Fasten the panels to the adjoining board with screws placed at 4-inch intervals. Add additional screws if the panels feel wobbly.
Step 2: Cut the Plywood Panels
Use a circular saw to cut the plywood to size. If you don’t own this power tool, you can rent one from Home Depot for $22 per day. Before you get cutting, make sure you’ve reviewed saw safety tips and general use instructions.
This video explains the basics of using a circular saw:
After cutting your plywood panels to size, use a permanent marker to label each one according to the window it will occupy. Using simple notations like “kitchen,” “guest bathroom,” and “kids’ bedroom” will simplify the first installation process, as well as any reinstallations needed for future storms.
Step 3: Seal the Wood
Once your boards are cut to size, it’s time to turn them into stormproof shields for your windows. Applying an exterior-grade polyurethane sealant is the best way to ensure your DIY storm shutters can withstand the rain. This step also helps the sheets of plywood last longer so you can use them again in the future.
We suggest using a product like Helmsman Spar Urethane, which is suited for interior and exterior use. This clear gloss sealant will protect your panels from UV rays, moisture damage, and temperature fluctuations for durable, long-lasting protection.
Paint the sealant onto your plywood panels with a paint roller and allow it to dry. If you have time, apply a second coat for the best results.
Step 4: Mark Drill Holes on Panels and Window Framing
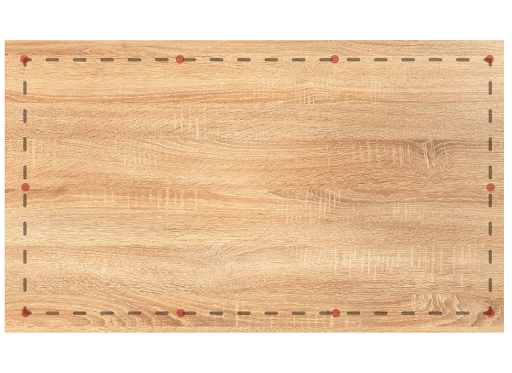
Now it’s time to mark your boards for drilling. Draw a line around the perimeter of each board, 1.5 inches from the edge of the panel. Make small marks at 12-inch intervals along the line, all the way around the panel.
Next, use a stud finder to locate the window studs on aluminum, vinyl, or wood-framed houses. For stucco homes, you’ll find the stud on the home’s interior wall and transfer that measurement to the exterior. Once you’ve located the studs, mark the spots for pilot holes on your panels so they’ll hit the center of the stud.
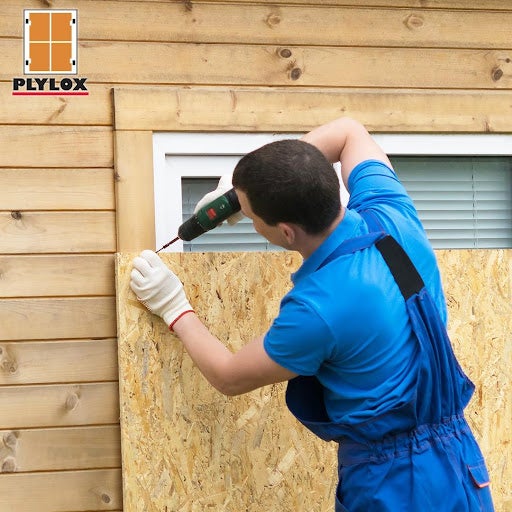
Step 5: Attach the Panels to the Window Frame
Grab your power drill and screws for the final step.
Drill pilot holes through the marks you made on the panels. Then, hold the board up to the window frame and screw in each corner. Depending on the panel sizes and window heights, you may need a helping hand.
We suggest using lag screws for this project. Lag screws are durable fasteners designed to connect heavy materials under intense pressure. This design is vital in holding up against the strong winds and beating rains of severe storms. No matter what type of screw you use, select one with a corrosion-resistant design. This will keep the fasteners in good shape for years, even after exposure to the elements.
Drill through the holes in the panels to create pilot holes in the exterior wall. If your home has concrete siding, you’ll need a masonry drill bit to complete this step.
Next, work around the panel, screwing a lag bolt into each pilot hole until the panel is securely fastened over the window. If you’re worried about damaging your home’s siding, slip a metal washer onto the screw before drilling it in.
That’s it – you’ve installed DIY storm shutters to protect your home from dangerous weather. Once the danger has passed, you can remove the screws and panels from the window and fill the holes with wood sealant/caulk.
For windows that are more likely to hold up to rough weather read our article about hurricane window cost.
How to Board Up Windows Using Plywood and Window Clips
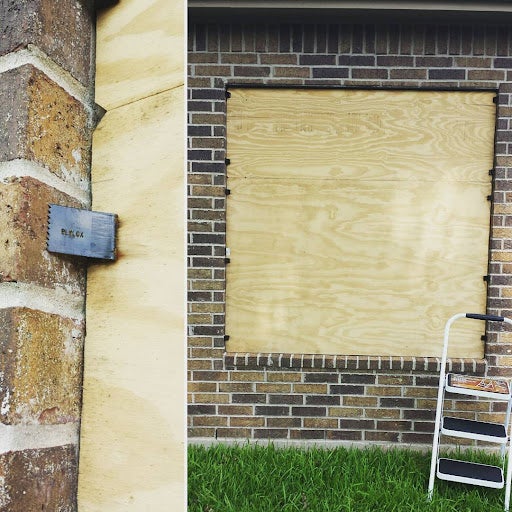
If you don’t have the time or resources to board up windows with screws, you can still protect your home with window tension clips. Tension clips secure plywood panels in recessed window casings without drilling or screws. They’re reusable, easy to install, and compatible with stucco, brick, and wood homes. Unfortunately, clips aren’t suited for homes with vinyl siding.
Follow the instructions below to board up your windows with plywood and tension clips:
- Measure each window casing from top to bottom and side to side, subtracting a quarter inch from both measurements. (If you need help choosing the right plywood panel sizes, you can take your measurements to a home improvement store for help from a pro.)
- Label each sheet of plywood according to the window it covers.
- Apply exterior-grade polyurethane sealant for water resistance and durability.
- Hammer the tension clips onto the edges of the plywood at 12- to 24-inch intervals, ensuring the tension legs are facing outward.
- Push the panels into the window frame and check for security.
- Remove the panels after the storm by pushing in on the panel with one hand and pulling each clip outward with the other hand.
- Store your clips together for easy access next time you need them
Final Thoughts
We hope this guide helps you improve the safety of your home and family this hurricane season. For more information on readying your home for severe storms, check out our hurricane preparation guide.


